
I was watching Martha Stewart Living a few months ago and learned this fabulous technique for making homemade glitter art. I filed it my brain for use later…and now that it’s time to decorate our nursery, I thought this craft would be great to make using the colors of the baby’s bedding.
I will warn you, this craft is a bit tedious with the mess of gluing and glittering combined with the time it takes to dry in between stripes. But if you have the patience, the end result of the bright, glittering colors is completely worth it!
Step 1, supplies:

Artist canvas, Tacky Glue, Painters tape, Small sponge brush,Glitter in assorted colors, and Finishing spray – the kind used to spray on art drawn with charcoal or pastels (not pictured).
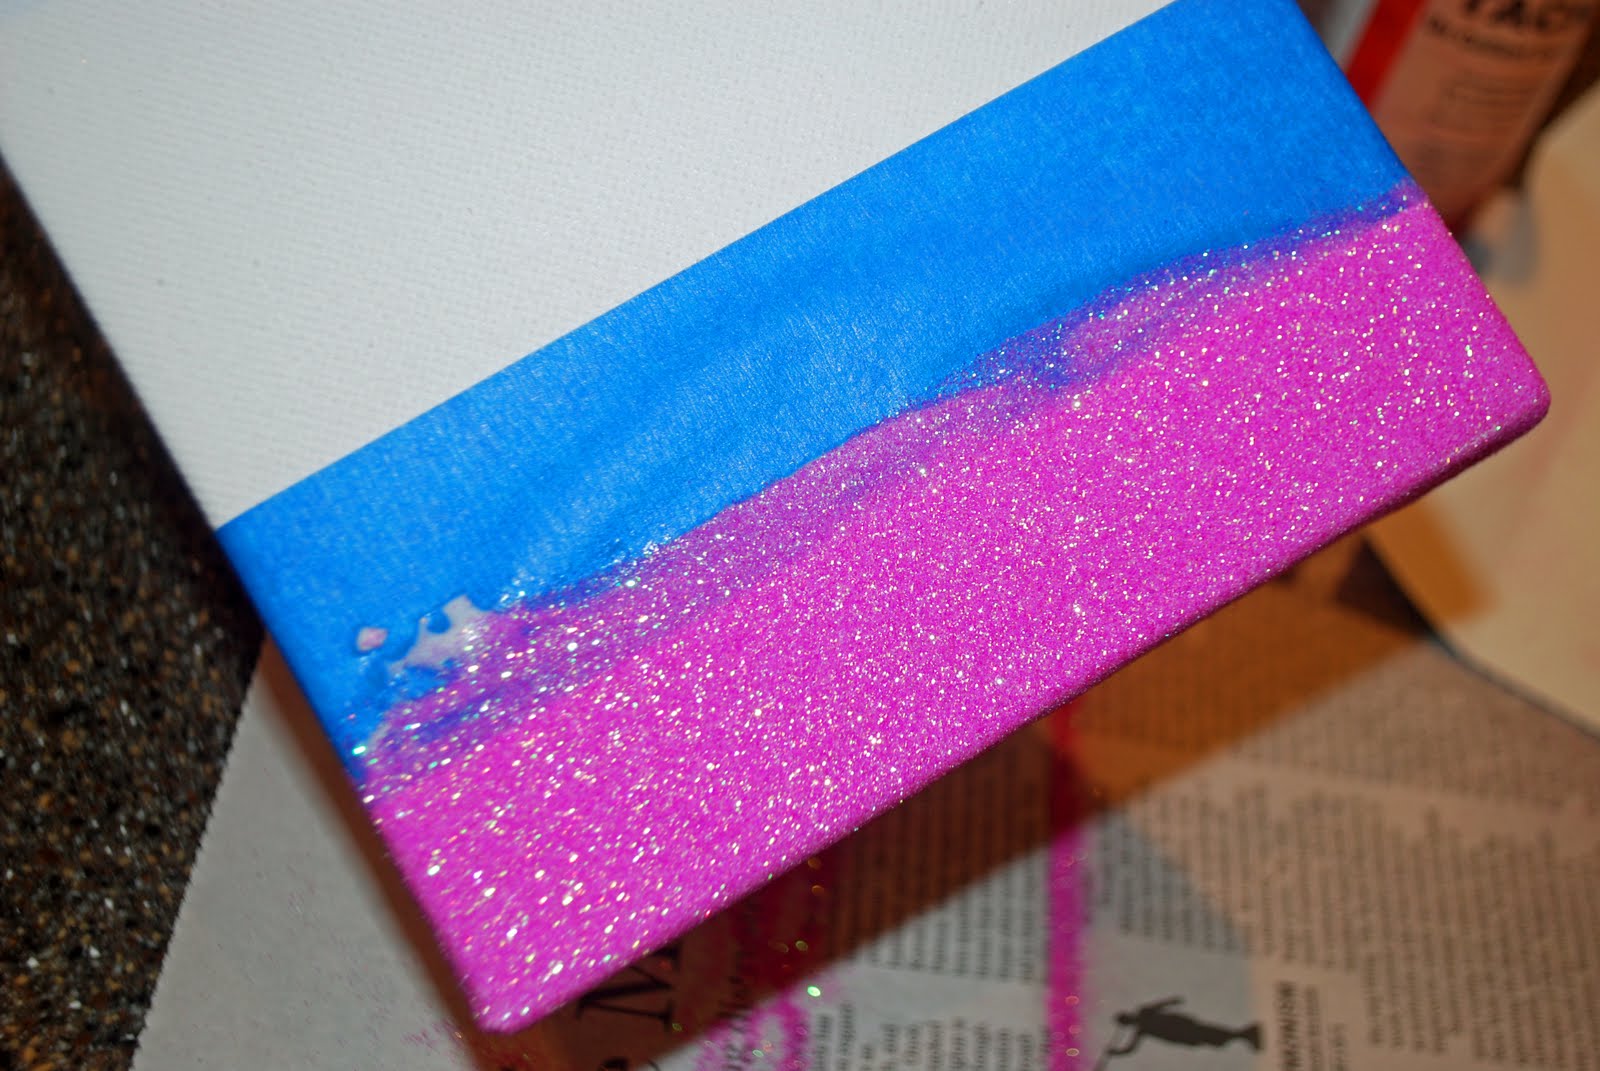
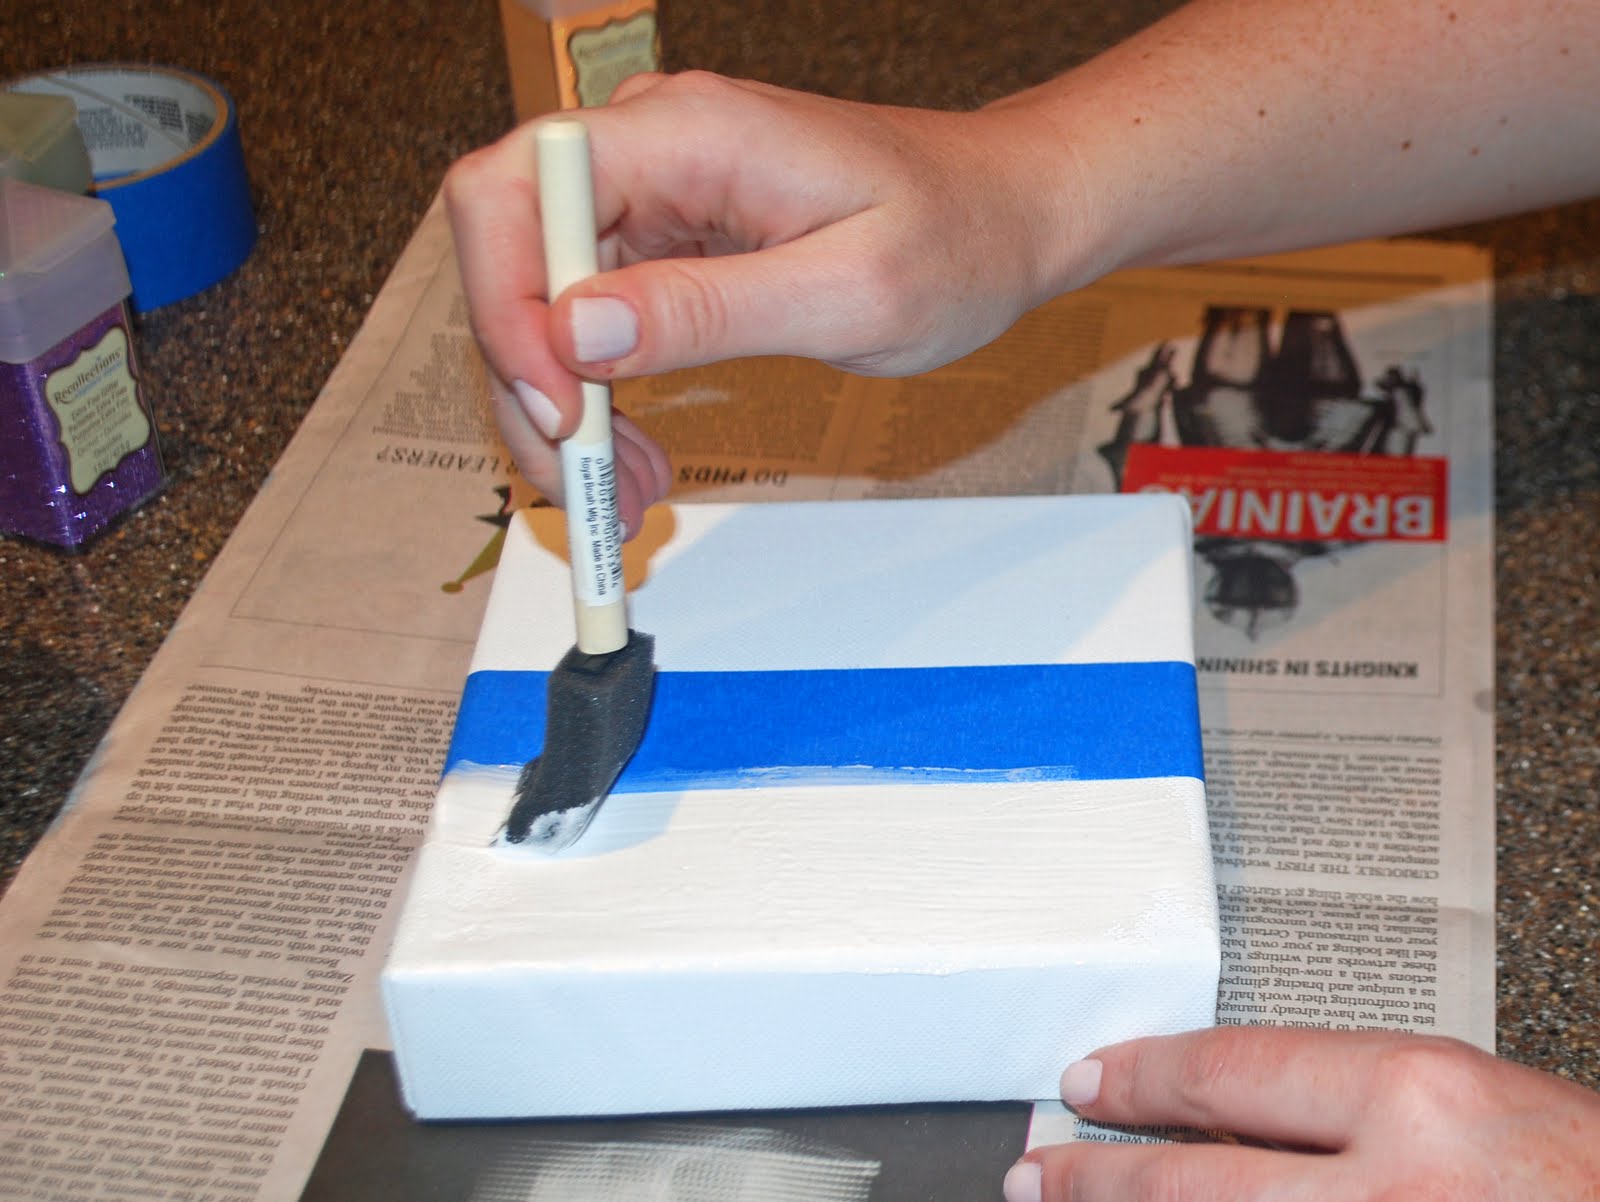 Step 2: Tape your first stripe to desired thickness. Then use your sponge brush to layer on a somewhat thick layer of tacky glue, don’t forget to glue on the perimeter of the canvas so the glitter covers all of the canvas. Sprinkle glitter over glue-y section. Let dry overnight.
 *Hint, you can do the ends one right after the next and let both dry overnight before you work into the center.
 Step 3:Once glue has dried overnight, you can remove the tape.
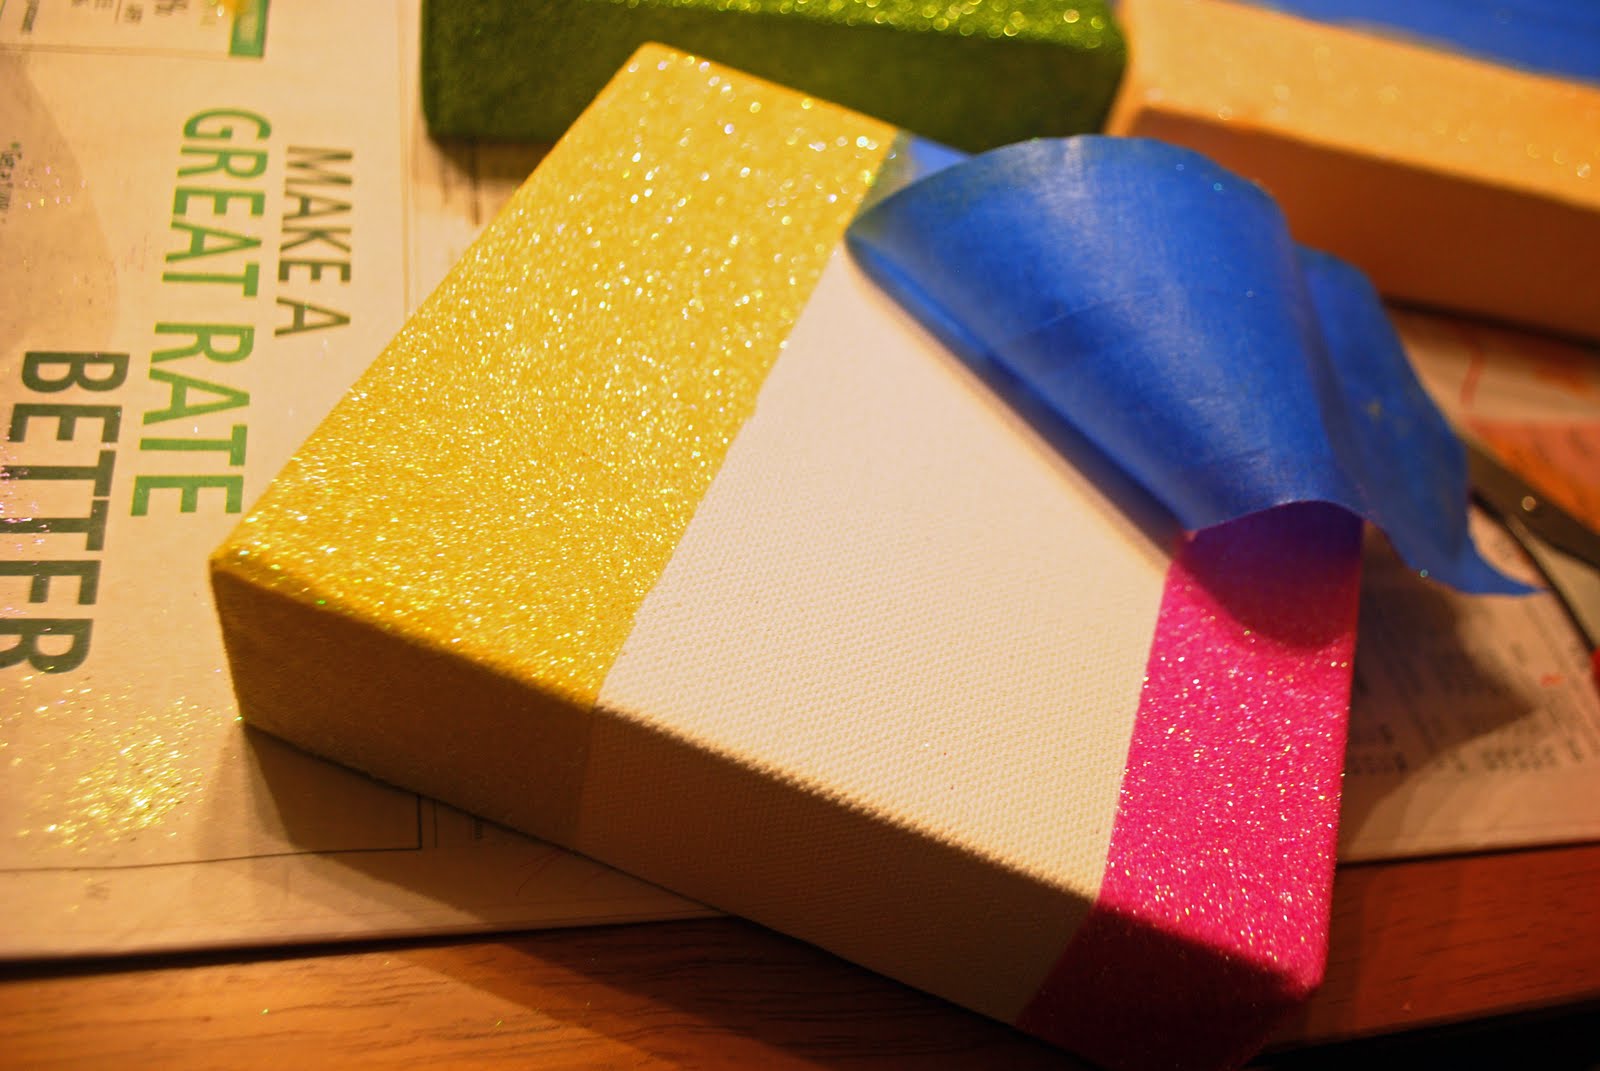
Step 4: Repeat taping, gluing and glittering for additional stripes in between your 2 ends. Let each stripe dry overnight before you do the next stripe so the painter’s tape doesn’t remove the glitter. For my project, I used 6″ x 6″ canvasses so I went with 4 stripes of varying width. Use what works best for the size canvas you’re making.
Step 5: Spray canvas with the finishing spray and voila – you’re done!
I am incorporating these 3 canvasses into the decor of the nursery, so stay tuned for the final reveal to see where they end up!

One thought on “Homemade Glitter Art”