It’s been over 2 months since I mentioned my new crafting hobby – cross-stitch! Not only cross-stitch but designing my own patterns and cross-stitching them. I thought it was time for an update and to give a few tips if you’ve decided to try designing patterns and cross-stitching them.
1. When sketching out your design using graph paper is easiest where one square in the graph paper equals one square in the cross-stitch, pretty simple. When I did my practice cross-stitch design with Z I used standard graph paper for my sketch – I actually just bought the only graph paper notebook I could find at CVS (who knew graph paper was so hard to find these days?). What I didn’t take into account was that the squares of my graph paper were MUCH larger than the squares in my cross-stitch cloth (aida cloth) – standard graph paper is 4 squares across per square inch whereas the standard aida cloth is 14 squares across per square inch. No big deal other than you have to make massive drawings that turn into tiny cross-stitch projects. I found a 5 squares across per square inch notebook at Staples but you can also get much smaller squares per square inch in an engineering notebook (although that comes at a much higher cost).

2. You use embroidery floss to cross-stitch (children of the 90s, what we used to make friendship bracelets!). Embroidery floss comes as 6 tiny strands twisted together, for your standard stitch, you’ll want to split those strands in half and stitch with just 3 strands at a time (increase to 4 for a thicker stitch, decrease to 2 or even 1 for a light stitch as I did with my necklace above).

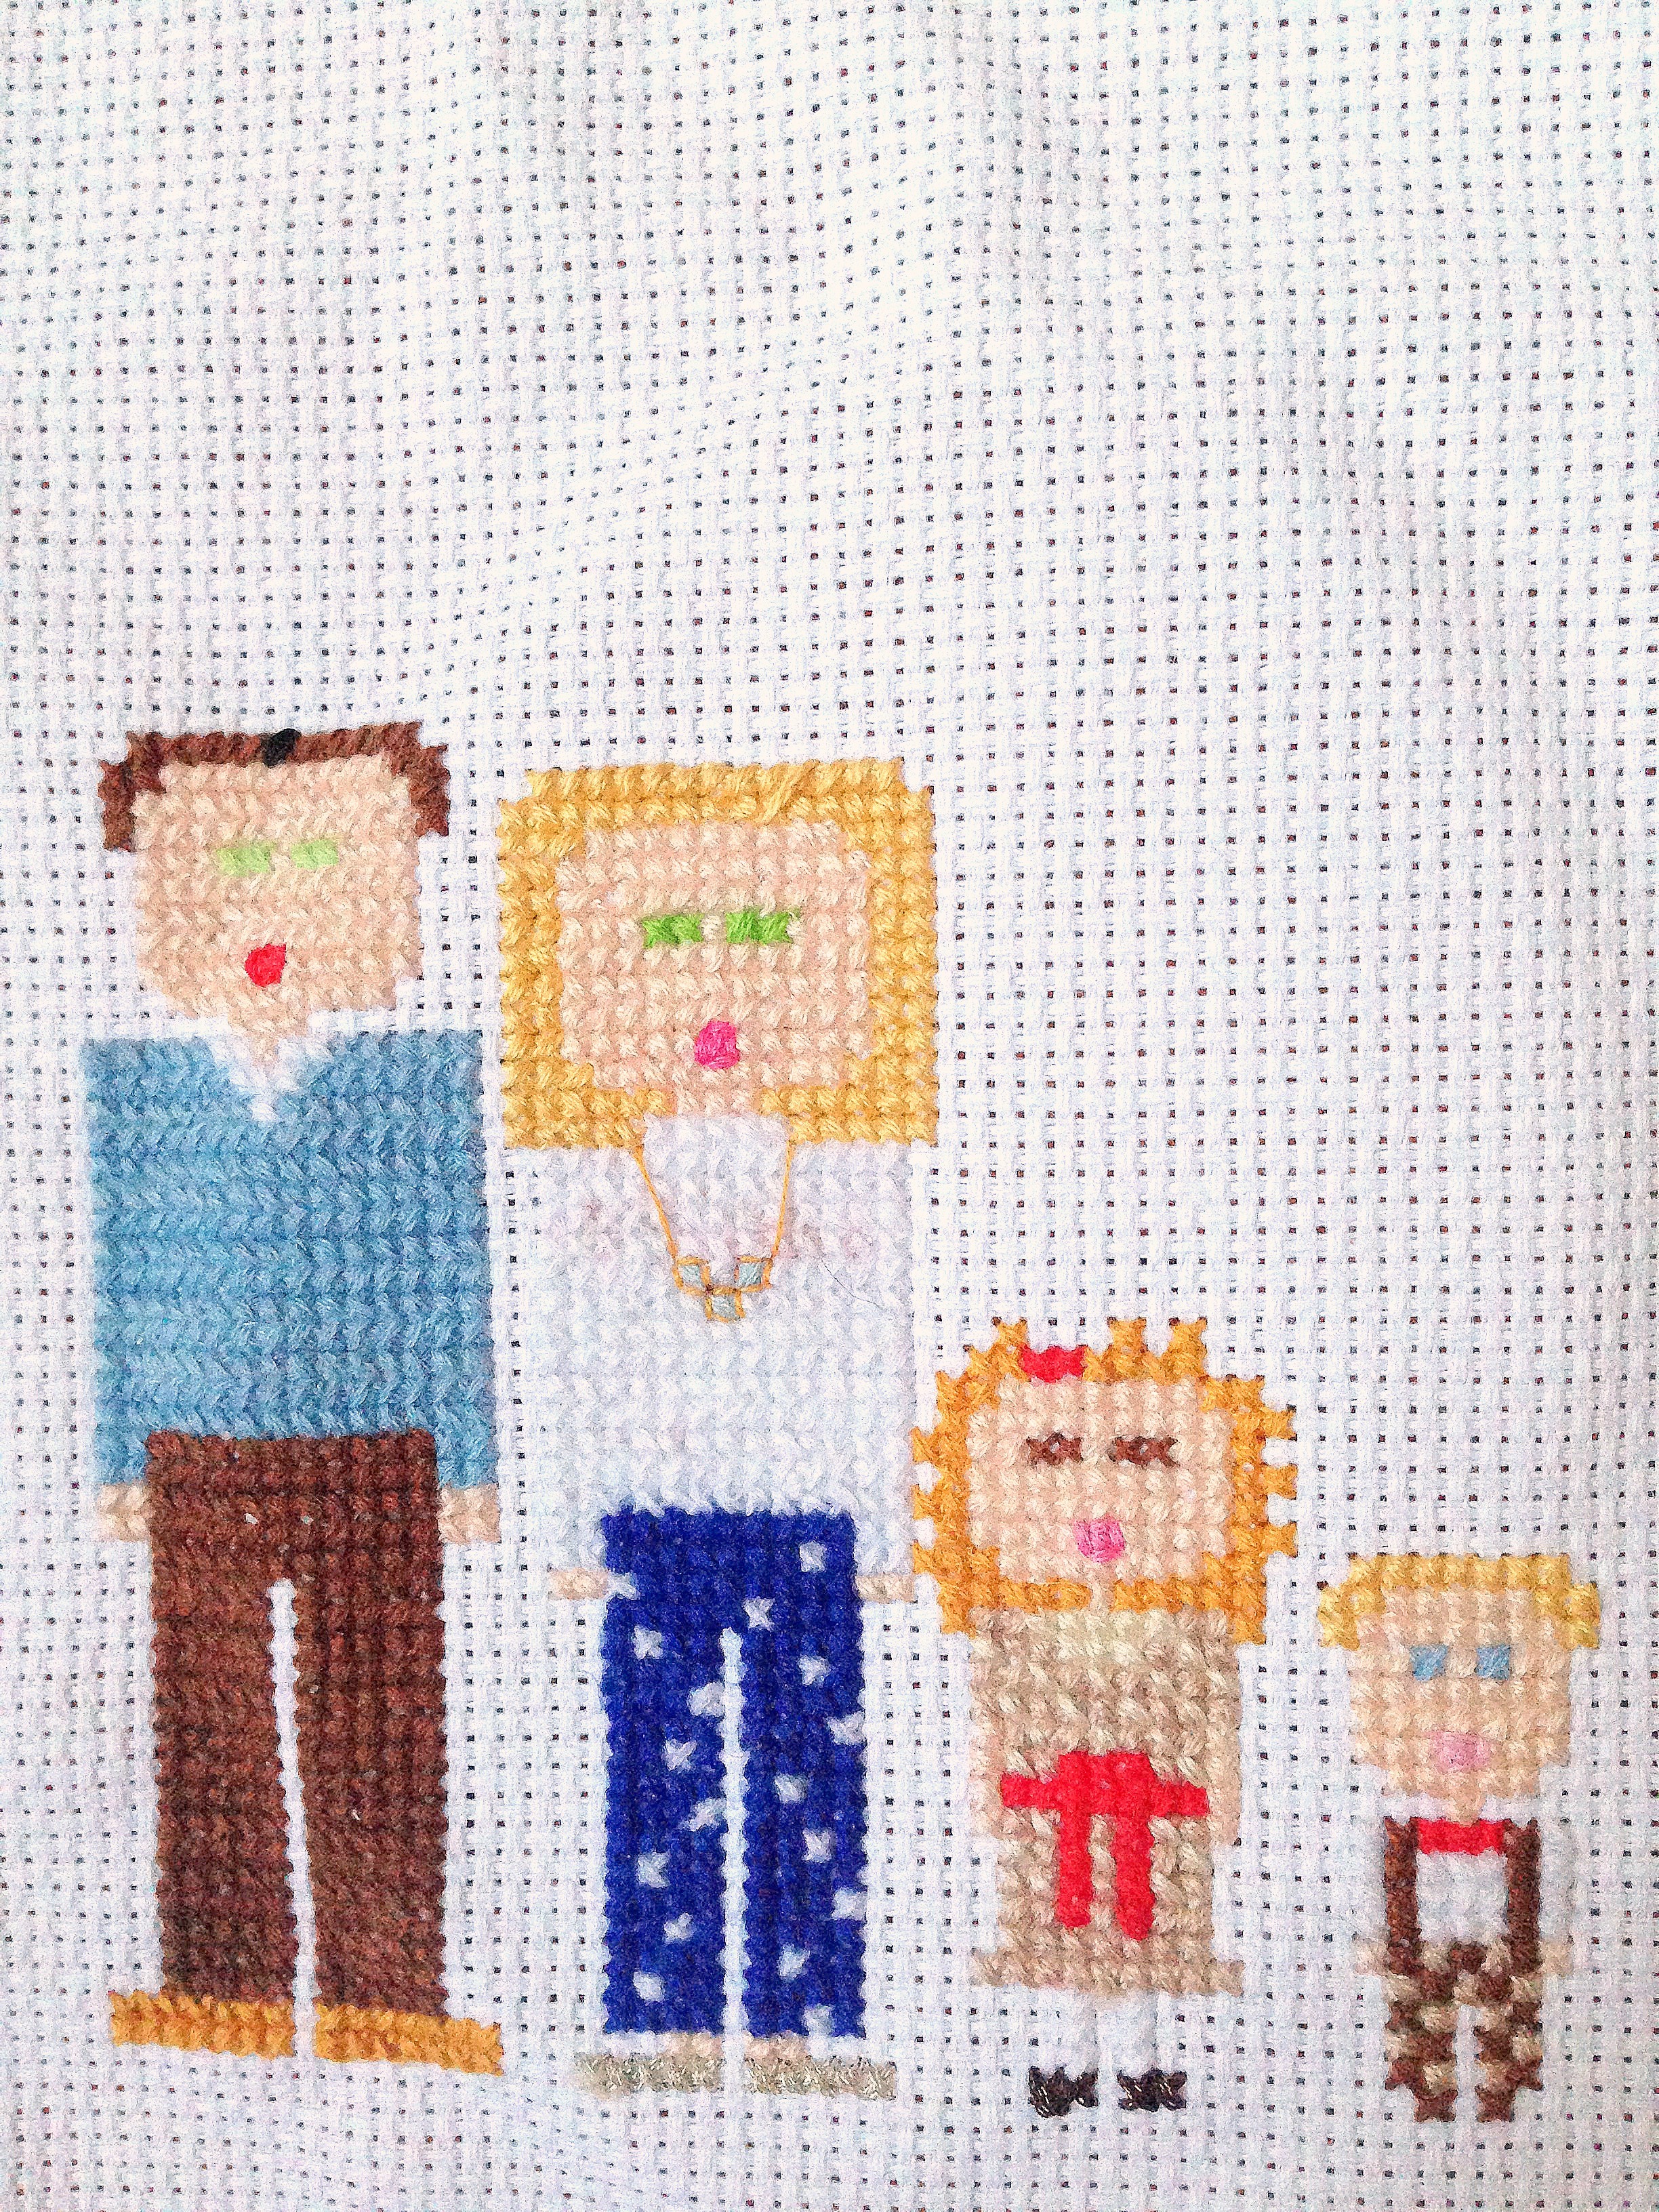
3. Do the quick math and properly scale the people in your cross-stitch. You’ll never get exact shapes with your cross-stitch (our heads are round and you’re stitching squares) but at least everyone’s proportions can be correct. The drawing I did of myself, once stitched onto the aida cloth seemed so out of proportion and it was. I had to go back and make my legs and torso longer which required un-sewing and resewing quite a bit. I started our family cross-stitch with my husband and adjusted all of us to his height accordingly. Learn from my mistake and do your math first!
4. The hardest part for me was getting our skin, eye, and hair colors accurate. There is a vast wall of embroidery floss at Michaels (where I bought mine) and I spent too much time agonizing over colors. I am off a bit on eye color for my husband and myself and Z’s hair is just wrong. It’s hard because I was using a family photo as a guide for outfits, etc… and I know next time to take more creative freedom in the details rather than trying to exactly replicate a photo.
I’m going to let this cross-stitch continue to flatten under a book (it has the lines from where it was stretched in the embroidery hoop) and then I’ll personalize it, frame it, and add it to the gallery wall in our living room. After this project I realize that I do prefer designing my own pattern but I think I’ll do something a little more abstract for my next project….I’ll do another update then!

That came out so good, I would love to learn cross stitch.
LikeLike